You have only seconds to win attention online. If your North Shore Colonial looks bright, spacious, and welcoming in photos, buyers will show up. If it reads dark or cluttered, they will scroll past. You want every image to sell the lifestyle people come to Huntington for: classic architecture, comfortable entertaining, flexible work and recreation, and seamless indoor-outdoor living. This guide gives you a photo-first staging plan tailored to center-hall Colonials from Dix Hills to Cold Spring Harbor, so your listing looks exceptional from the first thumbnail. Let’s dive in.
What buyers expect in Huntington
Premium buyers along the North Shore value a polished, move-in feel that supports daily life and entertaining. In this area, that often includes:
- Updated kitchens and baths that feel bright and functional.
- Clear options for a home office or flexible study space.
- Formal living and dining that transition smoothly to casual gathering.
- A finished lower level that reads as usable living space.
- Curb appeal and outdoor areas that suggest easy weekends and hosting.
Your staging should communicate these expectations in photos, then confirm them at showings.
Floorplan strengths to spotlight
Center hall flow
Center-hall Colonials shine when you show circulation and scale. Keep the hall clear and styled with one statement vignette so the camera can capture long sightlines into adjoining rooms. For photos, shoot both directions along the hall to demonstrate depth.
Formal rooms, modern use
Buyers often reimagine formal rooms. Avoid ambiguity. Stage one clear use per room that photographs well, such as classic entertaining, a serene music room, or a refined home library. Use symmetry where the architecture is symmetrical to feel balanced and intentional.
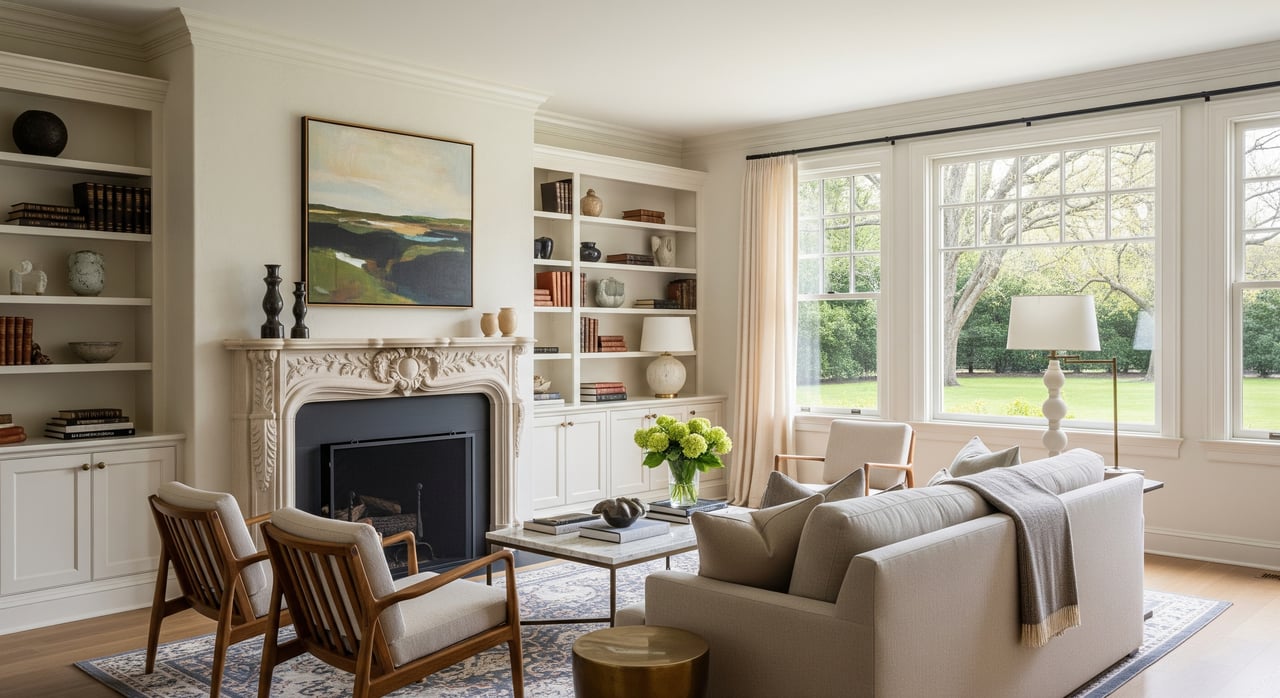
Fireplaces and built-ins
Fireplaces, moldings, and built-ins sell character. Keep surfaces clean and minimal so details read clearly. One mirror or art piece above the mantel, paired lamps, and a well-scaled rug will frame the focal point without clutter.
Lower level potential
Basements can add meaningful perceived square footage when staged as a media room, recreation area, gym, home office, or guest suite. Use lighter color, layered lighting, and low-profile furniture to counter lower ceilings and smaller windows.
A photo-first staging plan
Less but larger
Use fewer pieces that are sized correctly for the room. This creates negative space that makes rooms feel bigger in photos. Remove small accent furniture and extra rugs that break floor continuity.
Clean color and texture
Build a neutral base with warm greige, soft whites, or light gray walls. Layer texture through natural wood, linen, leather, and wool rugs. Add restrained accents in deep navy, forest green, or burnished metal for a premium feel that reads well on camera.
Lighting that flatters
Match daylight-balanced LED bulbs around 3000 to 4000K for consistent color. Layer ambient, task, and accent lighting. Turn lamps on for photos, even during the day, to add warmth and depth.
Room-by-room game plan
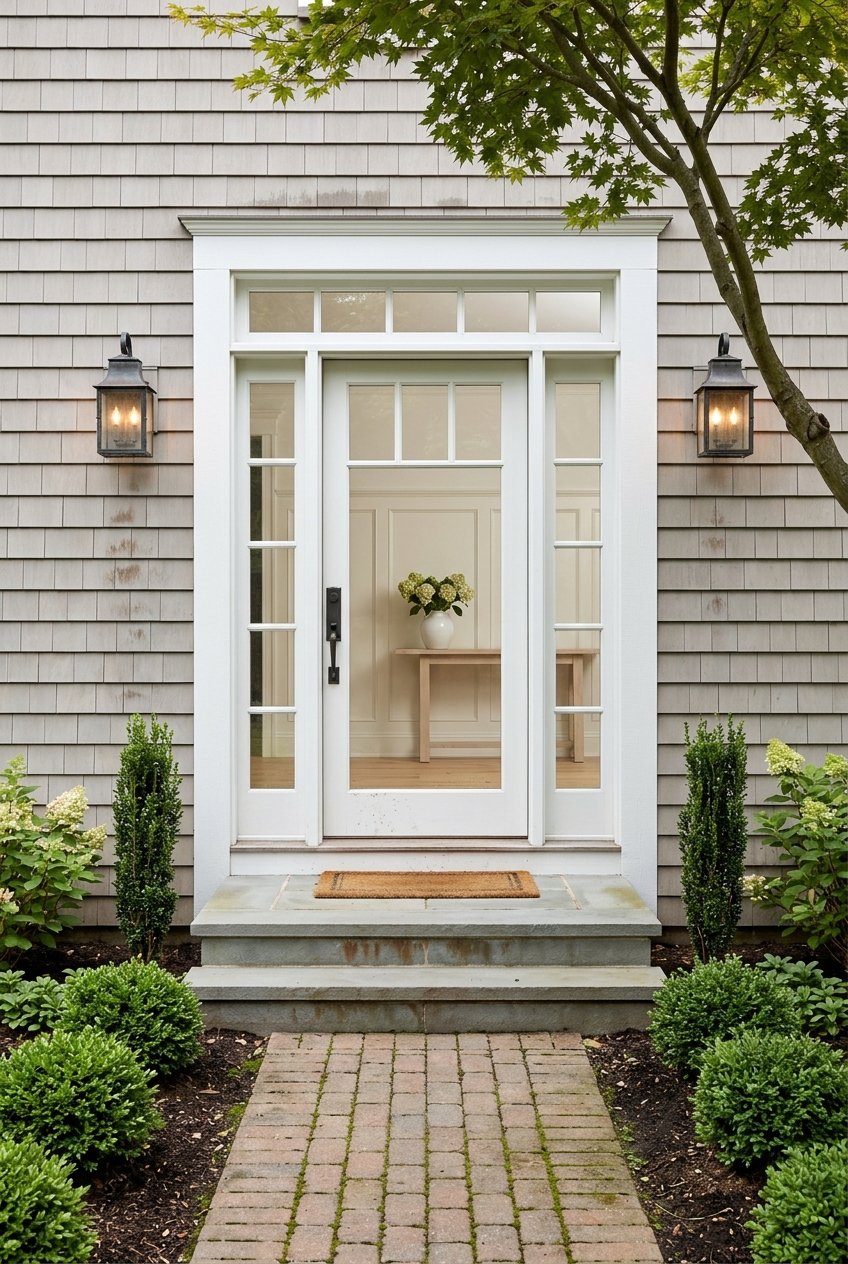
Entry and central hall
- Style one console with a single lamp, a sculptural object or vase, and a mirror to bounce light.
- Add a slender runner cut to the correct length to elongate the hall.
- Keep walls and closets tidy and closed. Consider one large-scale artwork to balance height.
Photo tips: Capture a wide shot down the hall to the rear rooms and a reverse angle back to the front door to show flow and scale.
Formal living and dining
- Living room: Anchor with a scaled sofa and two chairs set for conversation around the fireplace. One rug and one coffee table keep the scene simple and grounded.
- Dining room: Set the table for six to eight with clean linens and a fresh, simple centerpiece. Pull chairs back slightly for an inviting look.
- Use symmetry where windows or sconces align. Remove personal photos and busy accessories.
Photo tips: Open doors between rooms to show connection. Highlight moldings, floors, and windows in wide shots.
Kitchen and adjacent family room
- Keep counters mostly clear. A bowl of fruit, a clean cookbook, and a single vase are enough.
- If there is an island, use barstools and a small tray to suggest daily function.
- In the family room, position seating to show conversation and TV viewing zones.
Photo tips: Lead with a wide image that shows kitchen flow into the family room if possible. Add a few detail shots of finishes, but keep the gallery focused.
Primary bedroom
- Create a restful, hotel-like setting with neutral bedding and layered pillows.
- Use two nightstands with matching lamps for balance.
- If space allows, add a small sitting area to suggest morning light and quiet reading.
Photo tips: Shoot a wide that shows bed wall and a secondary angle to reveal any sitting area or en suite access.
Lower level and flex spaces
- Define zones with area rugs: media seating, game or craft table, bar or kitchenette, gym corner, or office.
- Choose low-profile seating and horizontal lines to ease lower ceiling height.
- Use light paint, bright rugs, and layered lamps to lift the space. Conceal utilities and store bins out of frame.
Photo tips: Shoot early in the day with all lighting on. Use angles that show the longest sightlines and any egress windows for light and safety.
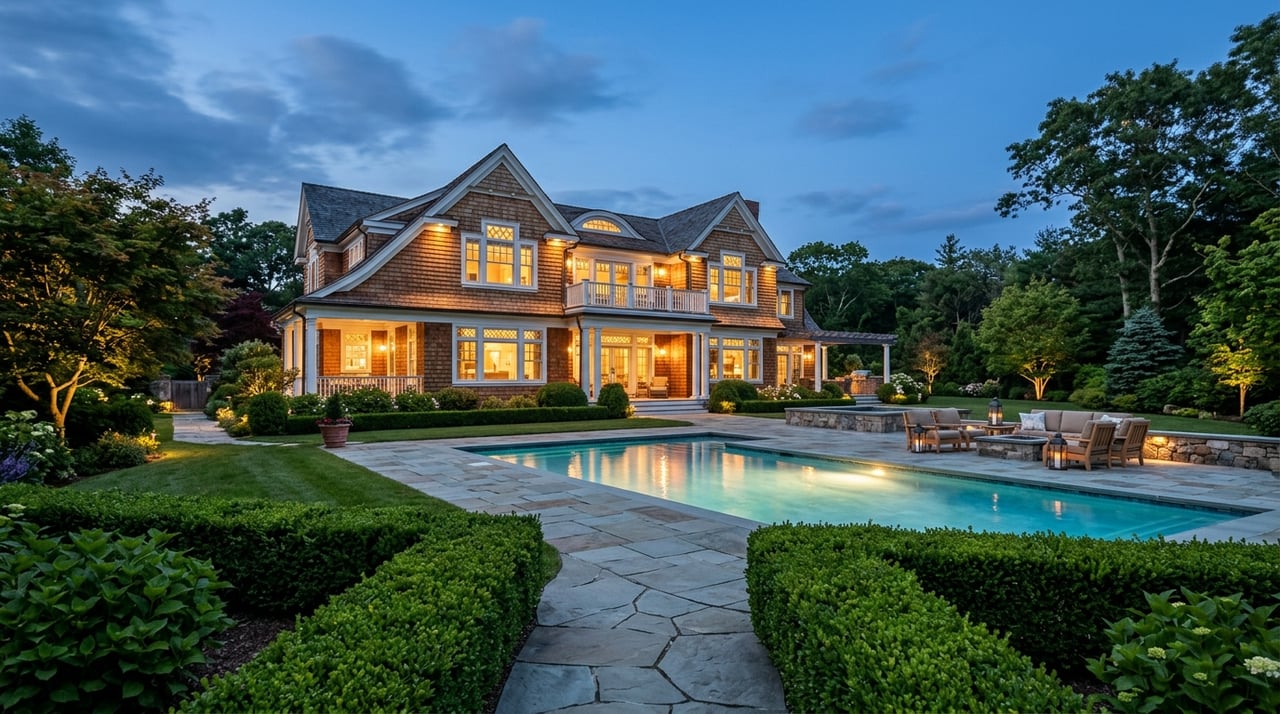
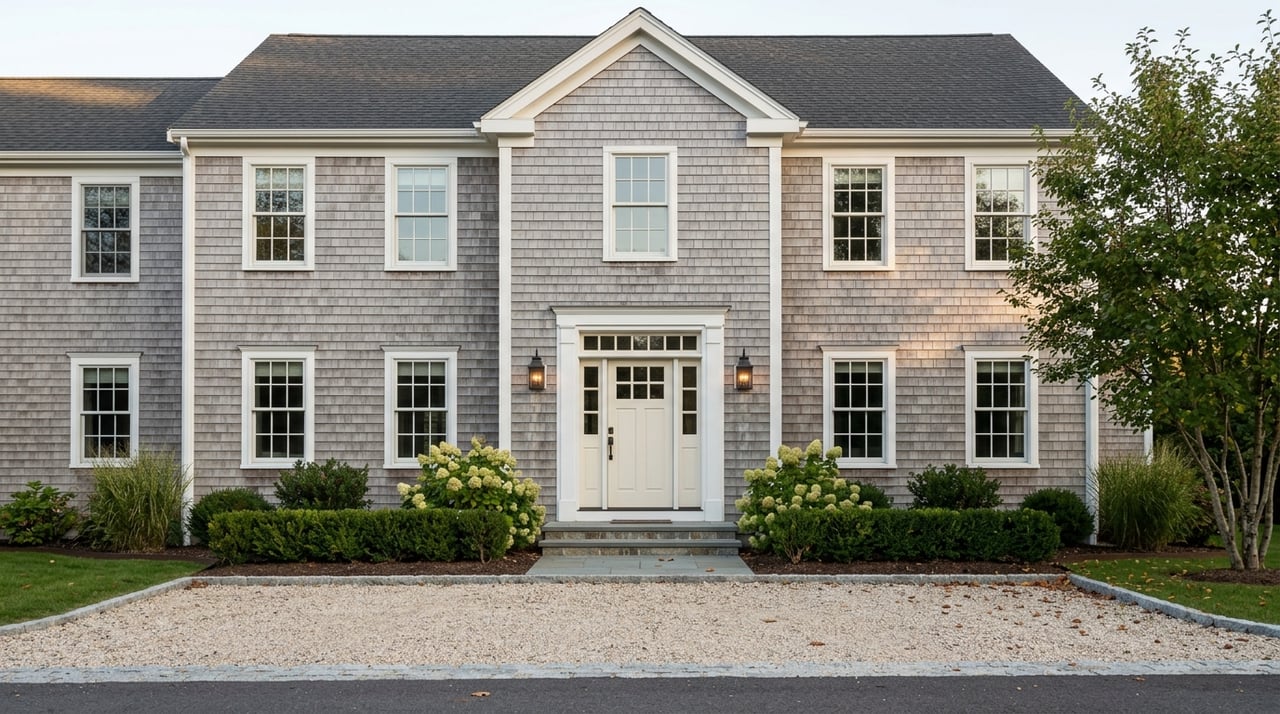
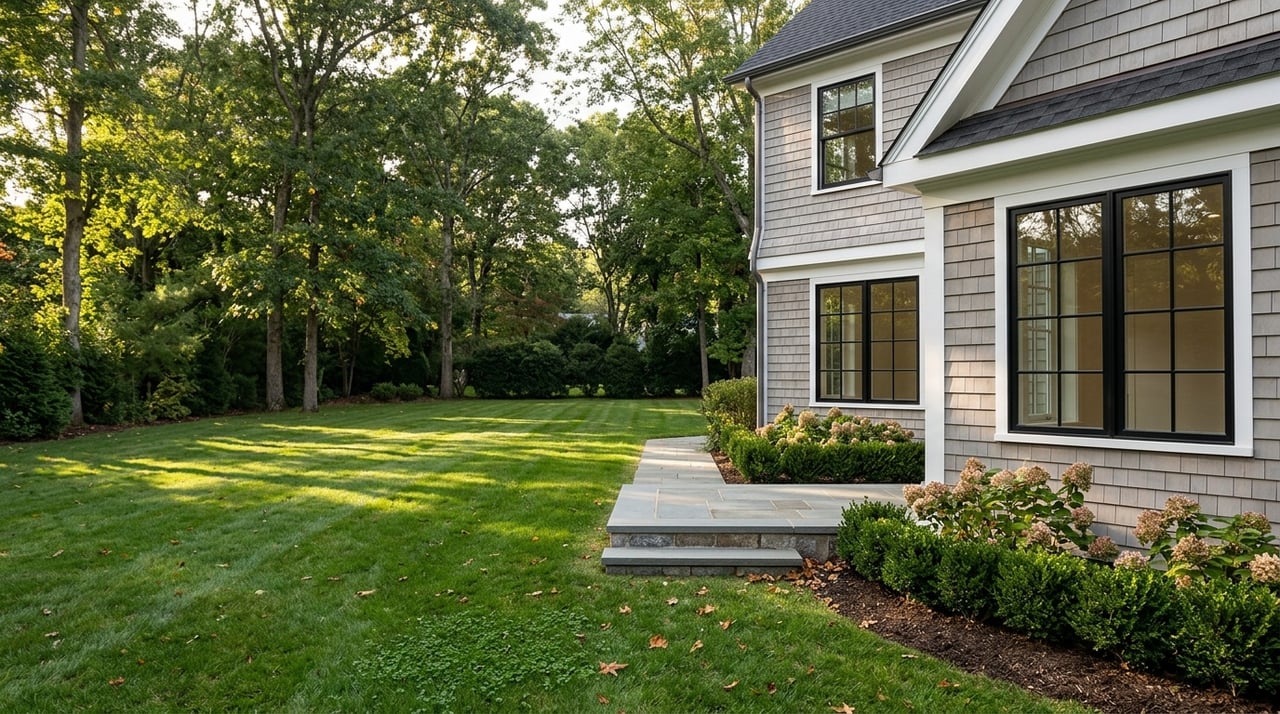
Exterior and curb appeal
- Refresh landscaping, remove dead growth, and prune to reveal the façade.
- Add seasonal planters at the entry, clean house numbers, and power-wash walkways and siding.
- Stage porch or patio seating with cushions and a small table to suggest relaxed outdoor entertaining.
Photo tips: Capture a bright daytime front elevation to set context, then a twilight image with interior lights on for a warm, premium feel. Include backyard lifestyle shots like a dining set or fire pit.
Color, materials, and finishes that photograph well
- Base palette: warm greige, soft white, or light gray on walls and large built-ins.
- Accents: restrained use of deep navy, forest green, rust, or brass tones through pillows and art.
- Textures: natural wood, leather, wool, and linen look high-end without visual noise.
- Avoid small, busy patterns that can create moiré in photos.
Pre-shoot checklist
- Deep clean windows, floors, grout, and reflective surfaces.
- Declutter and depersonalize. Box personal photos, paperwork, and small décor.
- Clear counters and open sightlines. Remove excess rugs that chop up floors.
- Stage the entry, main living room, kitchen and family room, primary bedroom, and lower level first. These drive online engagement.
- Address small repairs that will pop in photos, such as peeling paint or loose hardware.
Must-have photo deliverables
For a premium North Shore Colonial, request a complete, consistent gallery:
- Exterior wide front shot in daylight and a twilight shot.
- Entry detail and two hall flow angles.
- Full-room wide shots for living, dining, kitchen, primary bedroom, and main family room.
- Lower level wide shots plus zone details that prove function.
- Key details: fireplace, built-ins, kitchen materials, primary bath, and outdoor living.
- Optional: well-executed drone to show lot, trees, or proximity to water, when appropriate.
- Virtual tour or floor plan for clear navigation in larger homes.
Working with your photographer
- Keep camera height around 4 to 5 feet for natural scale.
- Use wide lenses, but not extreme, to avoid distortion.
- Bracket exposures carefully for bright windows and darker rooms without unnatural halos.
- Check reflections in mirrors and glass. Keep color balance consistent across the full gallery.
Budget, timeline, and ROI
Focus your staging dollars where photos and first impressions matter most: the entry, primary living and dining rooms, kitchen and family room, and the exterior. Allocate a moderate budget to the lower level when it increases perceived usable square footage, such as a guest suite or media room. Curb appeal touchups and twilight photography often deliver strong returns for premium listings.
A practical timeline looks like this:
- 2 to 10 days before listing: deep cleaning, minor repairs, and decluttering.
- 1 to 3 days before photos: professional staging installation and final styling.
- Photo day: interiors in the morning; exterior and twilight later in the day.
- After photos: keep staging in place for showings when possible.
Industry guidance indicates that well-staged homes tend to spend less time on market and can attract stronger offers in higher-end segments. On the North Shore, perceived lifestyle and move-in readiness are especially influential.
Avoid these common pitfalls
- Overly formal layouts that confuse modern use. Instead, show one clear lifestyle per room.
- Too many small accessories that clutter images. Use fewer, larger pieces with breathing room.
- Dark lower levels. Invest in light paint, layered lighting, and low-profile furniture.
- Virtual staging that misleads. If you use it, disclose appropriately and do not alter structural elements.
Ready to list with confidence?
When you pair a photo-first staging plan with disciplined photography, your Huntington Colonial will show the flow, light, and lifestyle buyers want. If you are planning a move from Dix Hills to Cold Spring Harbor or anywhere in between, we will help you prioritize the rooms and moments that matter most and coordinate a polished, stress-reduced launch.
Looking for a tailored plan for your home? Request a Home Valuation with Unknown Company and start your photo-first strategy today.
FAQs
What is photo-first staging for Huntington Colonials?
- It is a presentation plan that prioritizes how your rooms read in photos, focusing on entry, formal rooms, kitchen and family spaces, primary bedroom, lower level, and curb appeal.
How do I stage a lower-ceiling basement so it feels bigger?
- Use light paint, layered lighting, low-profile furniture, and rugs to define zones; photograph from angles that show the longest sightlines and any windows.
Which paint colors photograph best in North Shore homes?
- Warm greige, soft whites, and light grays reflect light well; add restrained accents in deep navy or forest green through art and pillows.
What should I do first if photos are a week away?
- Deep clean, declutter, and fix small items; then stage the entry, main living room, kitchen and family room, primary bedroom, and lower level before addressing secondary spaces.
Are twilight exterior photos worth it in Huntington?
- Yes, a well-executed twilight image with interior lights on can boost online appeal by conveying warmth and a premium feel that matches the North Shore lifestyle.